
Deathworld Terrain in 45 Minutes or Less!

So if you’re like me you’d much rather play 40K than build and paint terrain. But I do believe part of a great experience comes from great terrain.
I won’t lie… the Deathworld Terrain never appealed to me. “Aquarium trees” probably best describes my initial reaction. But they’ve grown me as I’ve seen them applied on different boards, and to be fair GW has come forward with 40K rules for the terrain for regular 40K rules (available in White Dwarf Magazine.)
This particular set came with my Deathwatch Kill Team Mordelai box set which you can see the initial teaser for HERE.
Basically the box comes with the Kill Team accessories we’re used to seeing plus enough sprues to make 3 distinct Deathworld forest pieces.
The Deathworld Forest is super easy to assemble so let’s get down to how I did this in 45 Minutes or Less! (drying time not included!)
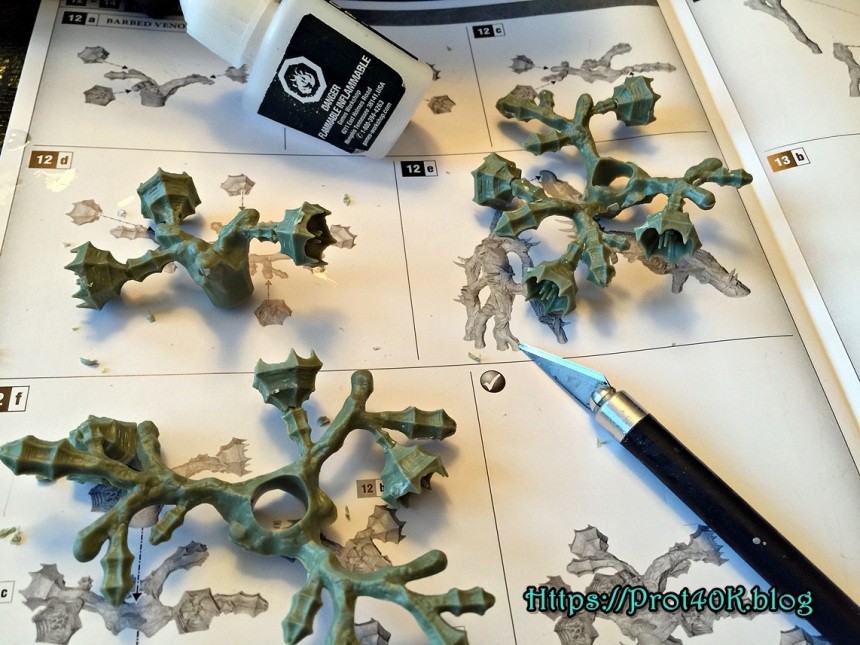
It’s some knobby hobbie plastic!
The kit is super easy to assemble. I’ll be honest at first I had to push myself to do these pieces because frankly they didn’t interest me. But the more I worked with them I actually grew to like them.
There are some strong mould lines. Personally I quickly ripped through those lines with a knife, and I found most of them to be unnoticeable because we are talking about organic models here.
I will add the disclaimer that for some reason (perhaps the colour added in the plastic) that I did not find plactic glue to work that well. Perhaps it’s because the pieces are certainly heavier than we’re used to working with in infantry pieces. I ended up using some Army Painter Super Glue which is fantastic stuff. I then propped pieces up, and simply waited for them to dry.
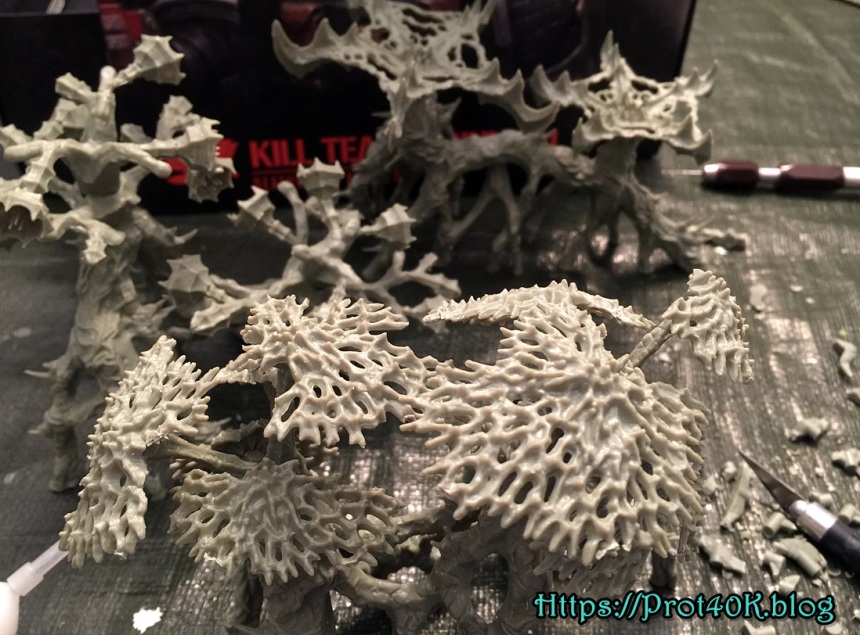
In a very short time, you can have your very own plastic forest too!
Part 2: Painting Killer Trees faster than you can say “Sloppity Bilepiper smells like Barbed Venomgorse!”
Basically the Kill Team Deathworld Forest set includes the 3 pieces of “Barbed Venomgorse” that is included in the full Deathworld Forest Kill Team box set (I’ll get to that later).
I confess I didn’t take pictures of this because it’s super straight forward, but literally all I did is this very simple process:
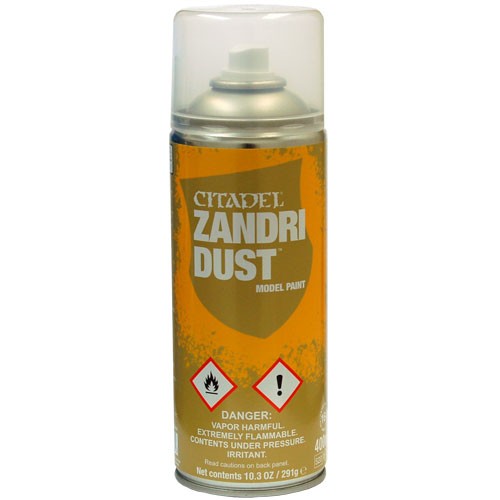
- Take the dried forest pieces to a well ventilated area and spray a healthy dose of Zandri Dust:
2: This is where I used a basic mix of black ink and brown ink, thinned down and wash the entire tree trunk. (don’t worry about the foilage).
After it dries, half the work is done for you. It’s really easy to pull detail from the tree trunks as they are full of all these great 3D vines, and growths we can dry brush later.
3: This might be the only ‘hard part’. I grabbed an airbrush and a few super funky, very high contrast colours. (We are talking about an alien tree here).
At first I used a rubber glove on the hand I held the trees with, but then I realized that some ‘over spray’ actually looked really good… very natural, so I wasn’t nearly concerned about being too neat.
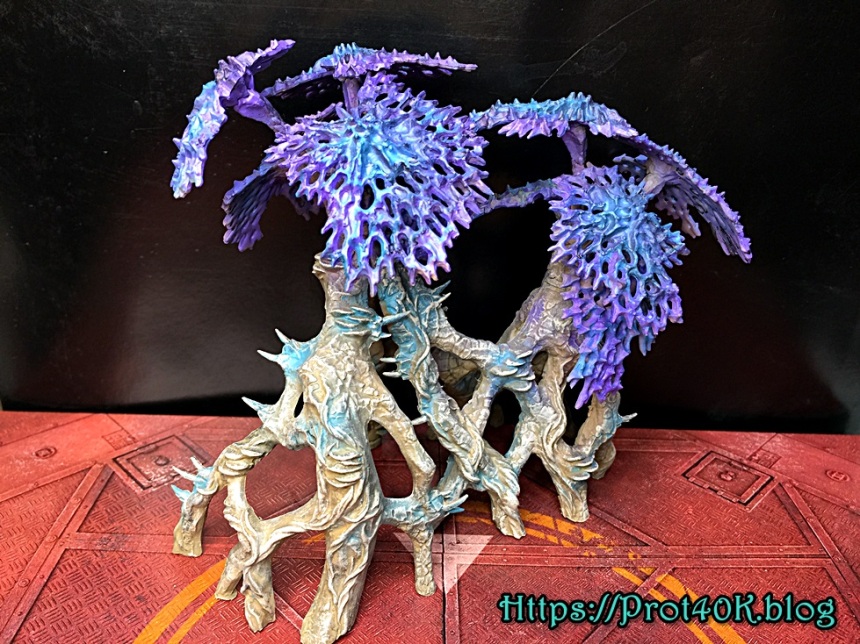
So the trick to ‘quick’ variety here is to start with a Primary colour: In my case it’s Purple. Then use a secondary colour to transition the flowers. In my case it’s Blue. High contrast is important to me. These plants look alien to me, with very, very little effort.
Now that you’re done plant one, take your secondary colour (Blue) and make it the starting/primary colour in your second plant:
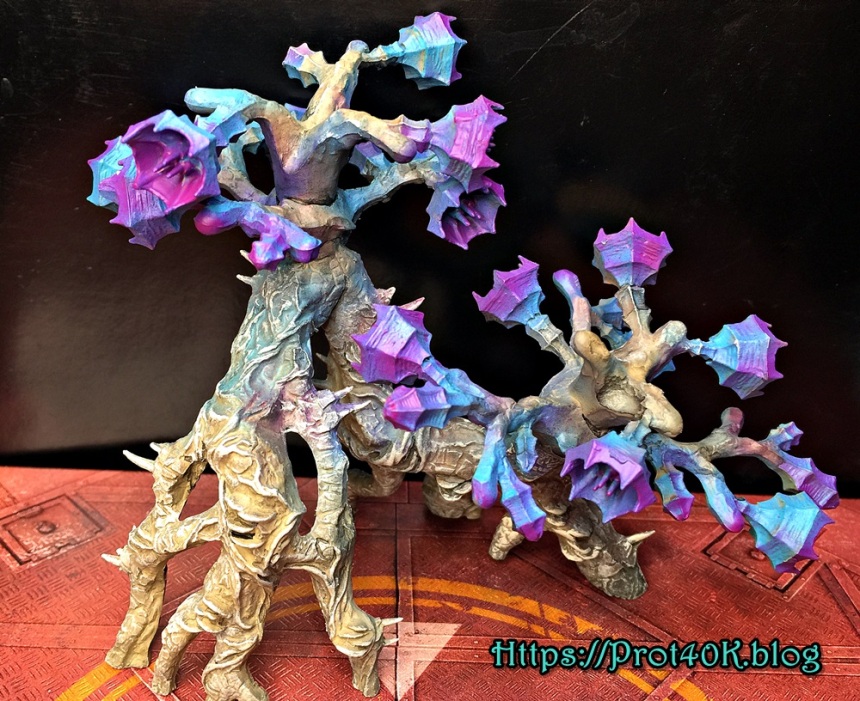
A little bit of overspray added a lot of organic feel to the quick job we’re doing here.
Finishing with a Purple colour I used that as my starting colour on the final tree set:
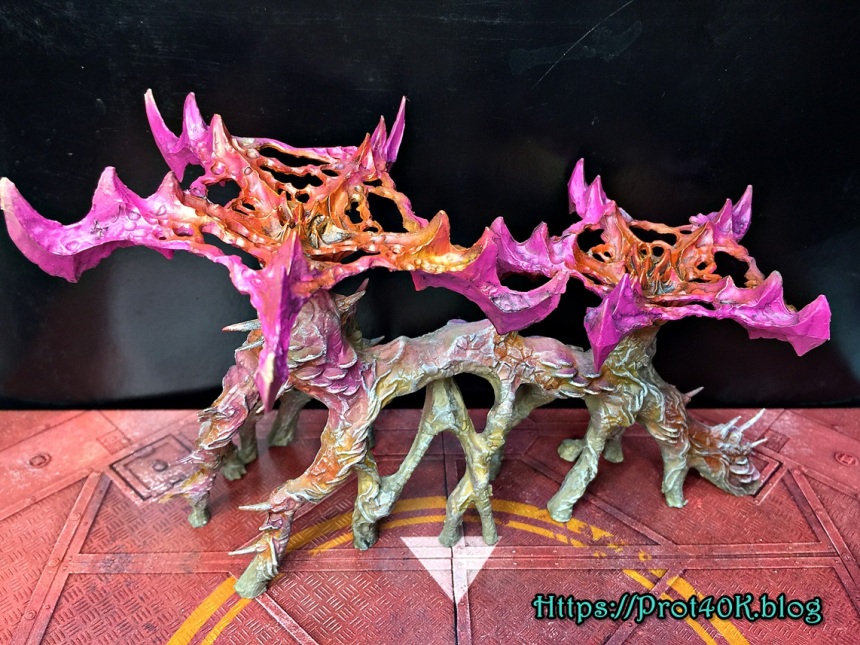
And in this case I went Orange on the finishing colour, and just blasted/painted the center of these plants with it for high contrast.
At this point you can tell I was enjoying the effect of over spray on the trees.
The final step here is to simply take a large Drybrush and give the trunks a good going over with a bone colour. Within minutes you’ll see the vines, platelets and growths popping out of the trunks.
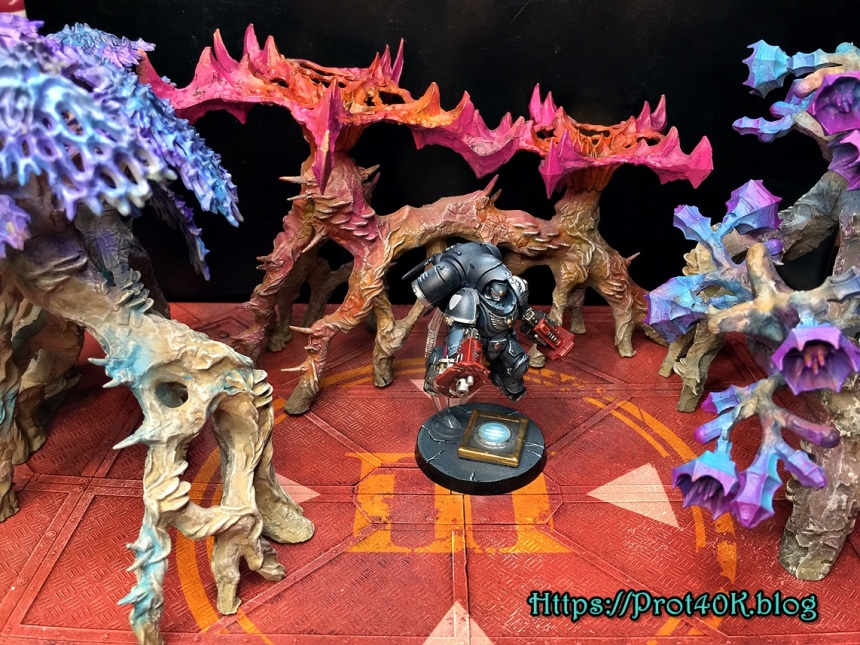
And with that we have a Deathworld forest to show for about 45 minutes of our working time! Not too bad and if you got this from the Mordelai Kill Team box, then you have a new scenario to try for your kill team games as well.
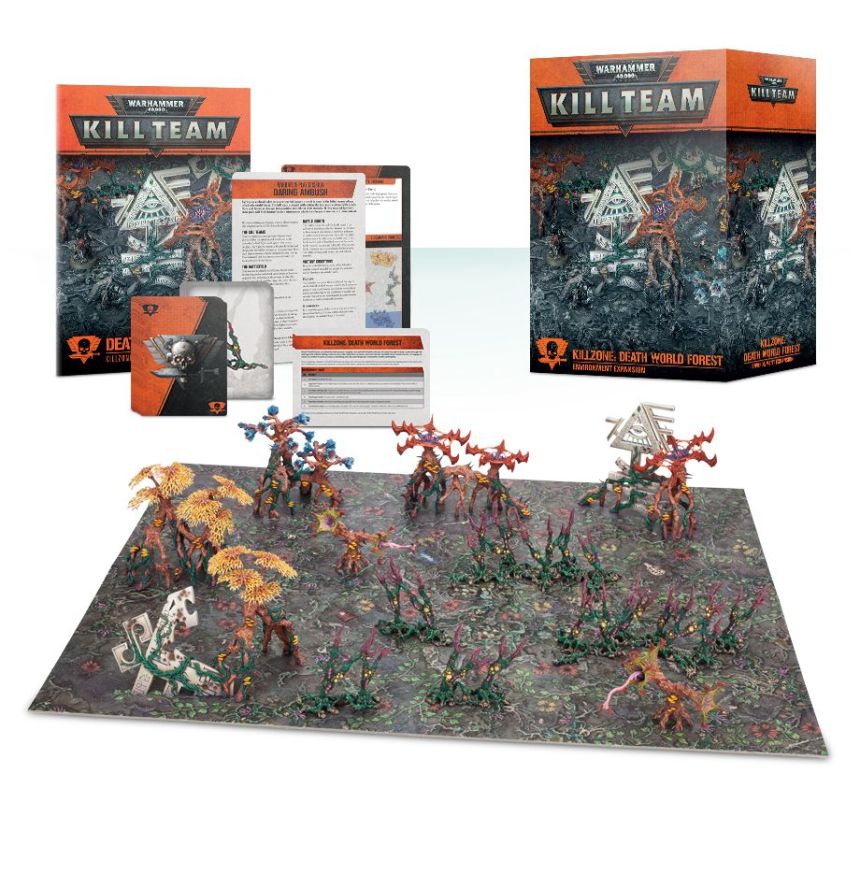
If this forest piqued your interest as it did mine, you might be interested in the subsequent, full Deathworld Kill Team box set from Games Workshop:
As always I hoped you enjoyed this and maybe it prompts you to finish your own organic terrain!
Now if you’ll excuse me, I have a 3 way mosh pit Kill Team game to fight my way out of:
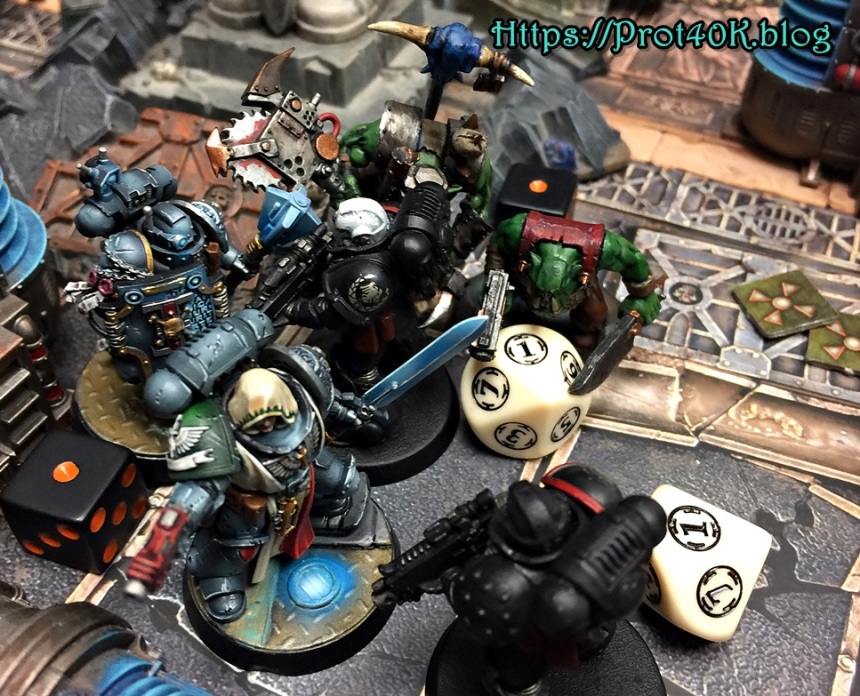
The Deathwatch Leader and his trusty Blackshield from ‘parts unknown’ fight for their lives against Raven Guard and stinky Orks.

This is so dope, dude. I will 100% bite this style. Did you ever end up doing any of the pieces with the Eldar ruins on it? I’ve got some ideas, but I’m curious how you would handle it.
LikeLike
Thanks! I only purchased the Deathwatch Kill Team kit with that terrain. I never did get the full terrain set that you would with the Kill Team map/scenario. It looks very fun though, and has its own rulesets for 40K as well so I think it’s worth it. No one wants to spend forever painting terrain but it’s not too hard to make it look pretty cool and fit the theme. Thanks for checking it out. 🙂
LikeLike
This is awesome man, I just ordered the full death world forest set and going to give this method a go. Mind if I ask what specific colors you used? Thanks!
LikeLike
Thanks! I honestly can’t remember. Most of these would be Vallejo blues and purples. I honestly just kept going and threw in the odd wash to bring some detail to it. The main trunks would have been sprayed with ‘bone’ primer and then just dry brushed a lighter colour. Good luck with it. A very fun piece to paint that lets you be pretty creative.
LikeLike